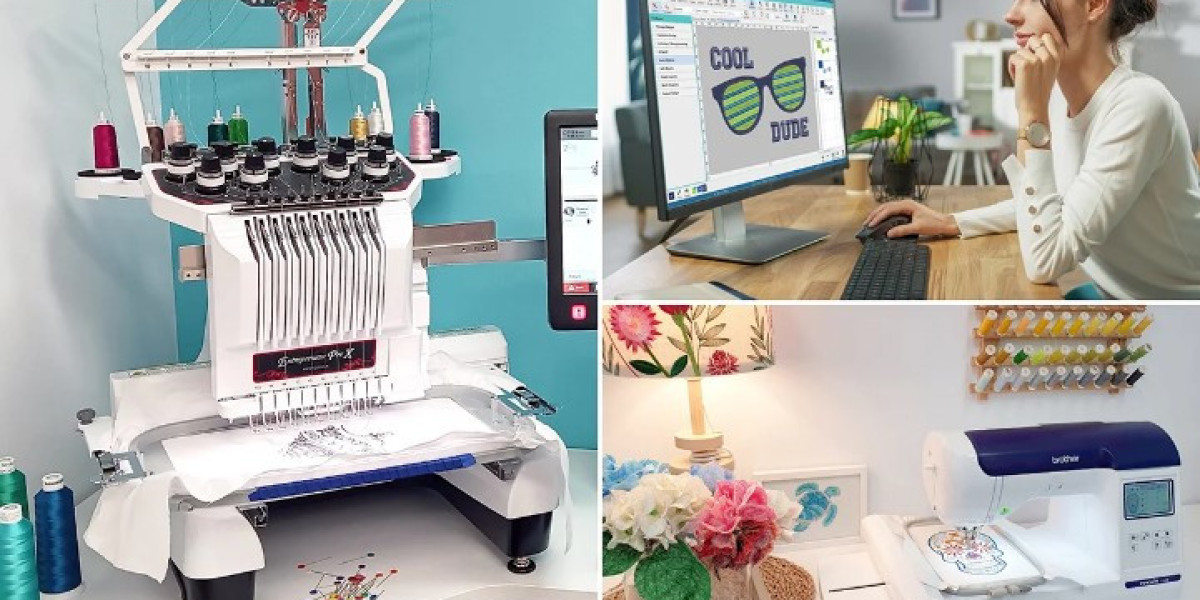

Have you ever downloaded an embroidery design that was almost perfect—but the size was wrong, the colors needed changing, or the design did not fit your hoop? You do not always need to start from scratch. With the right editing tools, small changes can make an existing design much more useful.
Embroidery design editing with ARTlink 9 can help users make practical adjustments to embroidery files before sending them to a compatible machine. The software is designed for viewing, editing, organizing, and preparing embroidery designs, making it useful for both beginners and experienced embroidery enthusiasts.
In this guide, we will look at what you can edit, how the main tools work, and what to check before stitching your final design.
What Is ARTlink 9?
ARTlink 9 is embroidery design software that can be used to view and make certain changes to embroidery designs. It provides tools for working with embroidery files and preparing designs for stitching.
Instead of thinking of it as a complete digitizing solution, think of it more like a design preparation and editing toolbox. You can make adjustments to an existing embroidery design without rebuilding every stitch from the beginning.
Depending on the file and editing function, you may be able to work with features such as:
- Design resizing
- Rotation
- Mirroring
- Design positioning
- Color adjustments
- Hoop selection
- Design combinations
- File format conversion
- Design viewing and printing
Available functions can vary depending on the software version and the type of embroidery file being edited.
Why Use ARTlink 9 for Embroidery Design Editing?
Imagine downloading a design for a shirt and discovering that it is slightly too large. Recreating the entire design would be unnecessary.
This is where embroidery editing software becomes useful. You can make practical adjustments to an existing design and prepare it for your project.
Some common reasons to edit a design include:
- Making a design smaller or larger
- Changing its orientation
- Flipping a design
- Adjusting its position
- Combining multiple designs
- Checking the design before stitching
- Preparing a file for a specific hoop
The goal is simple: make the existing embroidery design better suited to your project.
Embroidery Design Editing With ARTlink 9: Basic Workflow
The exact interface may vary, but the general editing workflow is straightforward.
Step 1: Open Your Embroidery Design
Start by opening the embroidery file you want to edit.
Before making changes, take a moment to review the design. Look at its overall dimensions, stitch count, colors, and position.
This quick check can help you decide what needs to be changed.
Step 2: Check the Design Information
Before resizing or modifying anything, check the design's basic information.
Look at:
- Design dimensions
- Stitch count
- Number of colors
- Hoop requirements
- Design orientation
- File format
Knowing these details helps you avoid making changes that could create problems later.
Step 3: Resize the Design
Resizing is one of the most common embroidery editing tasks.
For example, you may have a design that is suitable for a jacket but want to use it on a smaller shirt pocket. You can adjust the dimensions to better fit the new location.
However, avoid extreme resizing.
Making a design much smaller can cause tiny details and lettering to become difficult to stitch. Enlarging a design too much can also affect stitch quality and coverage.
Step 4: Rotate or Mirror the Design
Sometimes the design orientation needs to change.
Rotation can be useful when preparing a design for a different placement or hoop orientation.
Mirroring can also help when you need a reversed version of a design, such as creating matching left and right placements.
Always preview the result before sending it to your embroidery machine.
Change Embroidery Thread Colors
Another useful editing task is changing the displayed thread colors.
You may want to adjust colors because:
- The original colors do not match your garment.
- You use a different thread collection.
- Your customer requested different colors.
- You want to visualize alternative versions.
Remember that changing the color information in a file does not physically change the thread in your embroidery machine. You still need to load the appropriate thread colors when stitching.
Adjust Design Position and Placement
Placement matters just as much as design quality.
A logo that sits too close to the edge of a hoop or garment can create an unbalanced appearance.
Use the editing workspace to position your design appropriately and check its distance from the hoop boundaries.
For garments, consider the actual placement area rather than simply centering the design inside the hoop.
For example, a chest logo may need to sit differently from a large front design.
Working With Multiple Embroidery Designs
Sometimes one design is not enough.
You may want to combine:
- A logo and name
- A monogram and decorative element
- Two small motifs
- Text and a graphic
When combining designs, pay attention to spacing and overall balance.
Do not place designs too close together unless you intentionally want them to overlap. Crowded embroidery can create excessive stitching and may affect the final appearance.
Choose the Correct Hoop Size
One of the most important parts of embroidery preparation is selecting an appropriate hoop.
Your embroidery machine has a maximum sewing area for each hoop. The design needs to fit within that usable area.
Before stitching, check:
- Hoop width
- Hoop height
- Design width
- Design height
- Design position
- Required margins
A design that looks fine on screen may not fit your selected hoop.
File Formats and Compatibility
Embroidery machines do not all use the same file formats.
Common machine embroidery formats include:
- HUS
- PES
- JEF
- DST
- VP3
- EXP
- XXX
The correct format depends on the machine you are using.
When editing a design, always make sure the final file is saved or exported in a format your embroidery machine supports.
Do Not Confuse Image Files With Embroidery Files
A JPG or PNG is not the same as an embroidery file.
An image describes pixels, while a machine embroidery file contains stitch instructions.
If you want to turn artwork into an embroidery design, you generally need a digitizing process before the design can be stitched.
Does Resizing Affect Embroidery Quality?
Yes, it can.
This is one of the most important things to understand about embroidery design editing with ARTlink 9.
When you resize an embroidery design, you are changing the dimensions of existing stitch information. The result may not always be the same as having the design professionally digitized again at the new size.
For small adjustments, resizing may work well. But major changes can affect:
- Stitch density
- Small lettering
- Satin stitches
- Underlay
- Stitch length
- Design clarity
If a design needs to be dramatically enlarged or reduced, it may be better to have it properly re-digitized.
How to Edit Small Embroidery Lettering
Small lettering deserves special attention.
A word that looks clear on your computer can become difficult to read after stitching, especially when it is reduced too much.
Before stitching, check:
- Letter height
- Font style
- Spacing
- Stitch density
- Fabric type
- Stabilizer
Simple lettering is often easier to reproduce clearly than thin, complicated fonts.
If the lettering is too small, reducing the entire design may make the problem worse.
Preview Your Design Before Stitching
One of the easiest ways to avoid mistakes is to preview the edited design before transferring it.
Look for:
- Incorrect colors
- Unwanted overlaps
- Design distortion
- Incorrect orientation
- Hoop boundary issues
- Excessive design size
- Missing elements
A preview is not a substitute for a test stitch, but it is an excellent first check.
Test Stitch the Edited Design
If the design is important or you have made major changes, stitch a sample first.
Use fabric and stabilizer similar to the final project.
A test can reveal issues that are not obvious on screen, such as:
- Puckering
- Poor coverage
- Thread breaks
- Tiny lettering
- Excessive density
- Fabric distortion
It is much cheaper to discover these issues on a test piece than on a finished garment.
Common Mistakes to Avoid
Resizing Too Much
Large size changes can negatively affect stitch quality.
Better approach: Keep resizing moderate or have the design re-digitized for the new dimensions.
Ignoring the Hoop
A design can be perfectly edited but still fail to fit the selected hoop.
Better approach: Check the actual embroidery area before finalizing the file.
Changing Colors Without Checking Thread
A color displayed on your computer may not look exactly the same when stitched.
Better approach: Match the edited colors with the actual thread you plan to use.
Skipping a Test Stitch
Even a good-looking file can behave differently on fabric.
Better approach: Test important designs before using the final garment.
Editing Without Saving a Backup
It is easy to overwrite an original file accidentally.
Better approach: Keep the original design and save the edited version with a new file name.
Tips for Better Embroidery Design Editing
For a smoother workflow, follow these simple habits:
- Keep the original embroidery file untouched.
- Save edited designs with clear names.
- Check the hoop before resizing.
- Avoid extreme size changes.
- Review thread colors carefully.
- Preview the design before transfer.
- Test important designs on similar fabric.
- Re-digitize designs that require major structural changes.
These small steps can save time and reduce wasted materials.
When Should You Use Professional Digitizing?
Editing software is useful when you need simple changes to an existing design. But editing is not the same as creating a new stitch file from artwork.
Professional digitizing may be a better choice when you need:
- A logo converted from JPG or PNG
- Detailed artwork turned into stitches
- Small lettering optimized for embroidery
- Major design resizing
- Improved stitch density
- Better underlay
- Fabric-specific adjustments
- Complex stitch sequencing
At Digitizing Buddy, embroidery designs can be prepared with the actual stitching process in mind. This is especially useful when a design needs more than basic editing.
A Simple Example
Imagine you have a 5-inch logo that you want to place on a smaller shirt.
You could open the design, check the current dimensions, reduce it to a suitable size, reposition it within the hoop, review the colors, and preview the result.
But if the smaller version contains tiny text that becomes unreadable, simply shrinking the file may not be enough.
In that situation, the lettering and other small elements may need to be redesigned or re-digitized for the smaller size.
That is the difference between basic editing and professional embroidery preparation.
Frequently Asked Questions
What can I do with ARTlink 9?
ARTlink 9 can be used for various embroidery design preparation and editing tasks, such as viewing designs, making certain size and positioning adjustments, rotating or mirroring designs, managing colors, and working with supported embroidery formats.
Can I resize an embroidery design in ARTlink 9?
Yes, resizing is one of the common tasks associated with embroidery design editing. However, large size changes can affect stitch quality, so significant resizing may require professional re-digitizing.
Can ARTlink 9 convert embroidery file formats?
Supported file conversion depends on the software version and the formats involved. Always verify that the desired output format is supported and compatible with your embroidery machine.
Does changing thread colors change the actual embroidery?
No. Editing color information changes how the design is represented or prepared. You still need to use the desired physical thread colors when stitching the design.
Is ARTlink 9 enough for professional embroidery digitizing?
It can be useful for editing and preparing existing designs, but complex artwork often requires dedicated digitizing work. If a design needs new stitch structures, detailed lettering, or major changes, professional digitizing may provide better results.
Conclusion
Embroidery design editing with ARTlink 9 can make everyday embroidery preparation much easier. Whether you need to resize a design, rotate it, change colors, adjust placement, or prepare it for a different hoop, careful editing can save time and make your projects more flexible.
The key is knowing when simple editing is enough and when a design needs deeper digitizing work. Always check the hoop, avoid extreme resizing, preview your changes, and test important designs before stitching the final project.
With the right workflow, ARTlink 9 can be a helpful part of your embroidery design preparation process, especially when you want to make practical changes without rebuilding an existing design from the beginning.